

Why Your Cabinets Are Chipping (And How We Fixed It)
This week, I was called in to rescue a kitchen that needed some serious love. The previous paint job was failing—chipping at the edges, lacking proper prep, and just not holding up. Keep reading to see how I brought it back to life with a durable, professional finish.

The final product.
We color matched Wise Owl One Hour Enamel paint to the Sherwin Williams color, Alabaster. Look how flawless this kitchen is!
It is such a bummer
when you pay good money to have your cabinets professionally painted, just to have them start breaking down shortly after the painter packs up and leaves.
We’re remodeling our own home right now, so I completely understand how important it is to have things done right—the first time. With three kids and a zoo (not literally, but close enough) running around our house, our finishes have to last.
That’s why I love using Wise Owl One Hour Enamel. It dries fast, cures quickly, and hardens like stone. I can’t tell you how many times a client’s dog or kid has brushed up against freshly painted cabinets—and BOOM, it’s already dry to the touch.
(Did you know there’s an enamel paint out there with a 16-hour dry time? Yeah… no thanks.)
I do hear some hesitation from clients when they find out I’m not using a “big box” paint brand. Wise Owl is considered a “boutique” brand—and honestly, that’s one of the reasons I love it so much. It’s a small company with strong values and incredible products. They’ve stuck to quality over mass production, and I respect that.
Anyway... back to this kitchen.

In the photo above, you’ll see that some of the cabinet doors were already stripped by the time I arrived. Our client had actually started the project herself, out of frustration after struggling to find a painter willing to do the job right. We’ve all been there, right?
The doors were perfectly stripped and prepped for a wash-down. Honestly—ma’am, if you’re ever looking for a refinishing job, call me. 😂
Unfortunately, I didn’t get any photos of the major chipping, but if you’ve ever dealt with bad cabinet paint, you probably know exactly what I mean: cracked edges where water collects, chips along the door sides, and that all-too-familiar peeling finish.
There are a few common reasons this happens:
Improper surface prep
Inferior paint products
Skipped primer
Poor application technique
Once we got started, we followed our usual process. First, the doors were removed and carefully labeled, then taken back to our shop for spraying. Meanwhile, the cabinet boxes were cleaned thoroughly and scuff sanded on-site. Scuff sanding creates what's called mechanical adhesion—those tiny tooth-like scratches that give primer something to grip onto. From there, we applied two solid coats of primer.
All of this happens within one to two full days, depending on the size of the kitchen.
Now—let’s talk about what went wrong in this space and how we diagnosed the problem.

Edges where paint was not adhered appropriately.
On day two, back at the workshop, I got started on the cabinet doors. First step? Cleaning. So I popped in a podcast, grabbed my Green EZ cleaner and a stack of shop towels, and got to work.
Cut to about 30 minutes later when—of course—I ran out of towels and had to make an emergency trip to Lowe’s. Classic.
Once cleaned, you know what comes next: SCUFF SANDING!
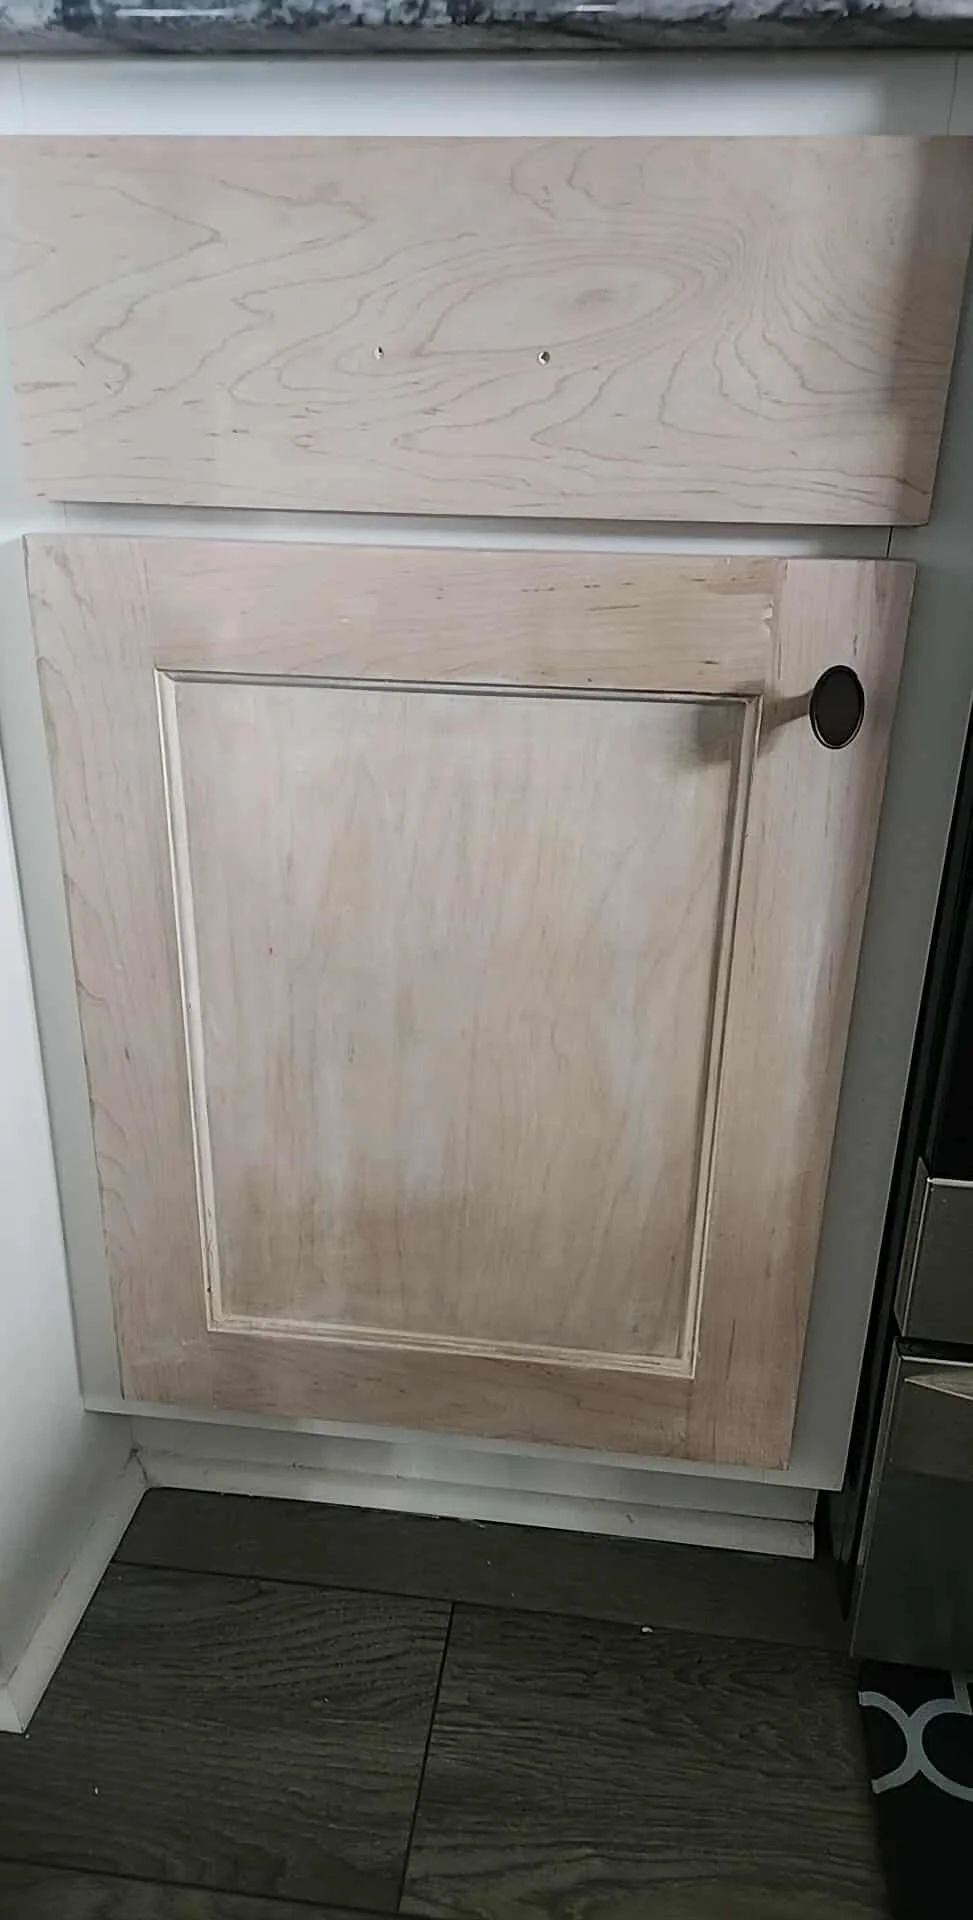
So, BOOM, there I was, SurfPrep in hand, sanding away with a 150 grit pad. That grit level is just enough to give the surface some texture—it shouldn't be aggressive enough to pull paint off. But as you can see in the photo above… it was.
The paint on the left side of the door was holding up great—exactly what I expect from a professional finish. But the section where bare wood is showing? That’s where our client had been noticing issues. Yep, mostly along the edges.
The fact that most of the paint held up well actually tells me it wasn’t a product problem. The paint used appeared to level beautifully and, honestly, held up surprisingly well for being over 10 years old.
What I Think Happened:
In my opinion, this was a case of poor application and technique.
It looks like the previous painter didn’t apply a thorough, even coat of primer and paint. When I spray, I always use a cross-hatch pattern—up/down, then left/right—for full coverage. I also apply two coats of primer followed by two coats of paint, ensuring every surface is properly sealed.
When spraying paint, it’s important to get a 50% overlap with each pass. My guess? The original painter did a quick pass that didn’t fully cover the door edges—just one light coat, without follow-up. And unfortunately, the edges are some of the highest-contact areas on a cabinet door. If they’re not coated and sealed correctly, they’ll chip and fail fast.
How I Fixed It:
After diagnosing the issue, I stuck to my tried-and-true refinishing process.
First, I completed a thorough scuff sanding, removing any paint that wasn’t fully bonded to the surface. Then I sprayed two coats of primer, sanding between coats—first with 220 grit, then with 320 grit to get a smooth-as-glass base. From there, I finished with two coats of Wise Owl One Hour Enamel for a strong, professional finish.
Here’s a little TikTok I made that has a clip of my spraying process:
Because yes — sanding really is about 90% of my job.
We wrapped up the project over the course of the week and reinstalled the doors on Day 5. I’m so happy with how this kitchen turned out. The finish is smooth, durable, and done right — and now our client can enjoy her space without worrying about peeling paint or worn edges.
I call that a win.
What do you think? 👇


Thinking About Refinishing Your Kitchen?
Don’t settle for a finish that chips, peels, or wears out too soon. At Honeybee Home, we specialize in high-end cabinet and furniture painting that stands the test of time.
Get in touch today for a free quote
or
Follow along on Facebook, Instagram, and TikTok to see more behind-the-scenes projects!
Contact Us
@honeybeehomenc